Hazelnut and Orange Blossom cakes

Hello all. I hope you’re well! I know that I haven’t shown any signs of life since Christmas (have any of us?) but I’m here today with a recipe and a hope- that this blog won’t wilt and die like the few houseplants I’ve owned.

I do feel more positive about this enterprise though. I’m always going to bake, and so I might as well carry on with the blog! It pushes me to go that bit further (this sometimes leads to existential baking crises in Lakeland, but it’s all in good fun! I’m happy!). It also justified me buying a new tin today, which really makes me happy, even though I have absolutely no space left anywhere and far too many tins to begin with.

Hazelnut and Orange Blossom cakes

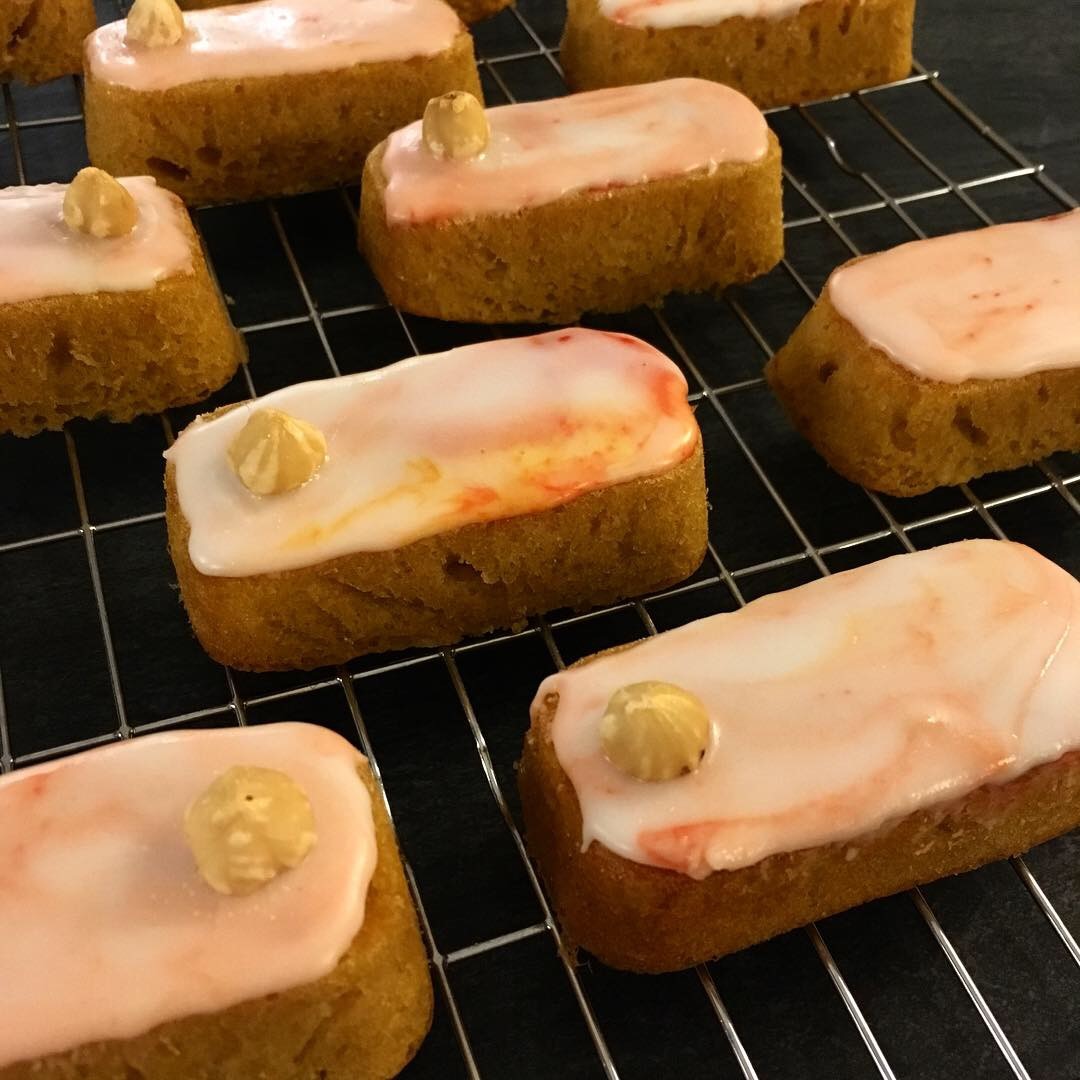
This tin is silicone with a wire edge which gives it a bit of stability (hallelujah!). I think I’m definitely going to invest in more silicone tins, and I’ll tell you for why (if you care to read). I find that gluten free cakes are often a bit more delicate than their wheaty cousins, and the thin top layer of cake in particular is very liable to peel or flake off, and to be left stuck on metal tins no matter how well you grease them. With silicone tins, these cakes popped out as neat as you please, fully intact. I’m sold!

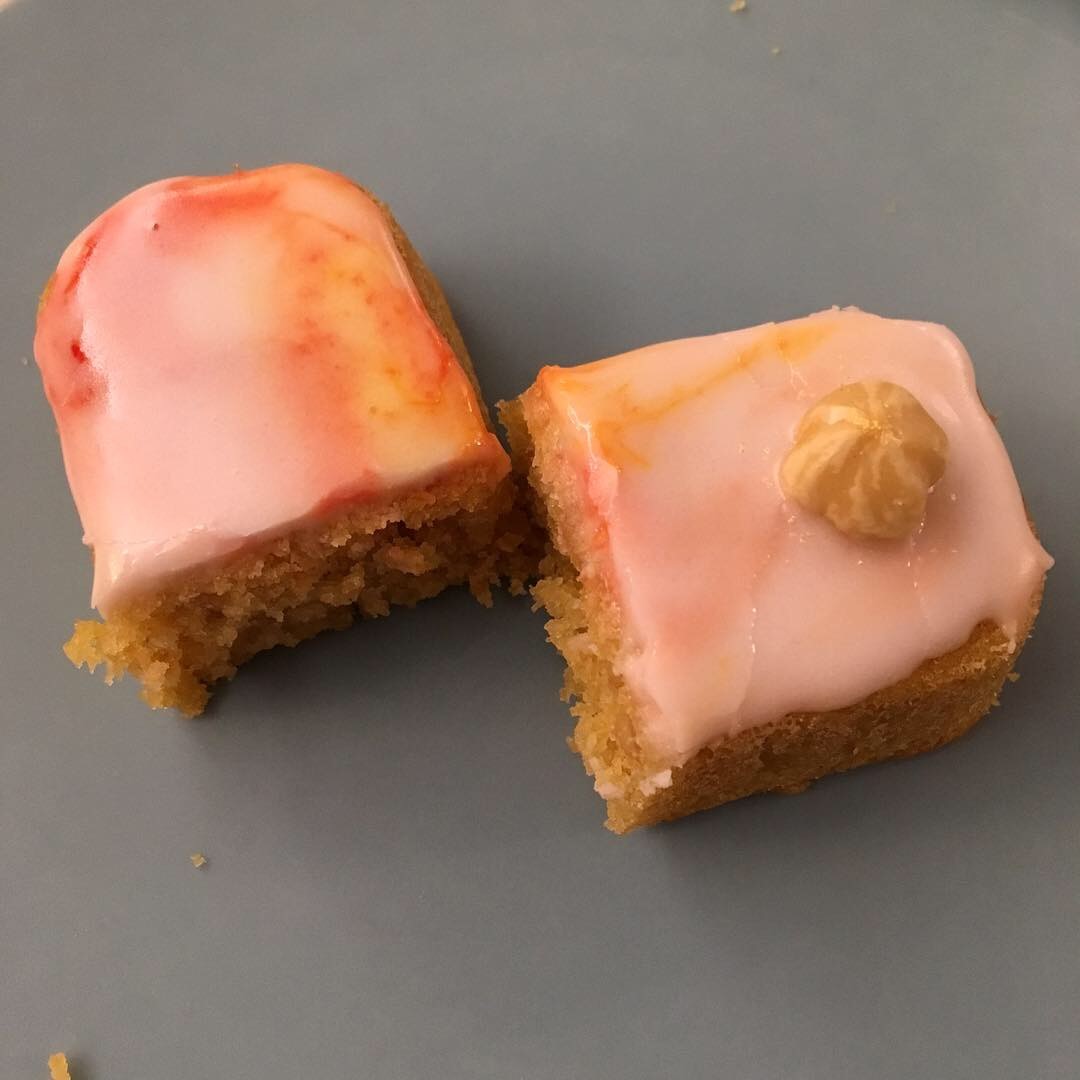
These cakes also happen to be dairy free as well as gluten free thanks to the fact that we had some dairy-free spread left in the fridge. The sponge has blitzed roasted hazelnuts taking the place of some of the flour, orange zest, and a little orange blossom extract. The sponge is light and moist, with crunchy pieces of hazelnut. I realised upon trying the batter that the way I had put this cake together resembles the composition of a perfume: the hazelnuts provide the rich, deep base note, the orange zest is a middle tone, and the orange blossom water offers a floral, zingy finish.

Hazelnut and Orange Blossom cake

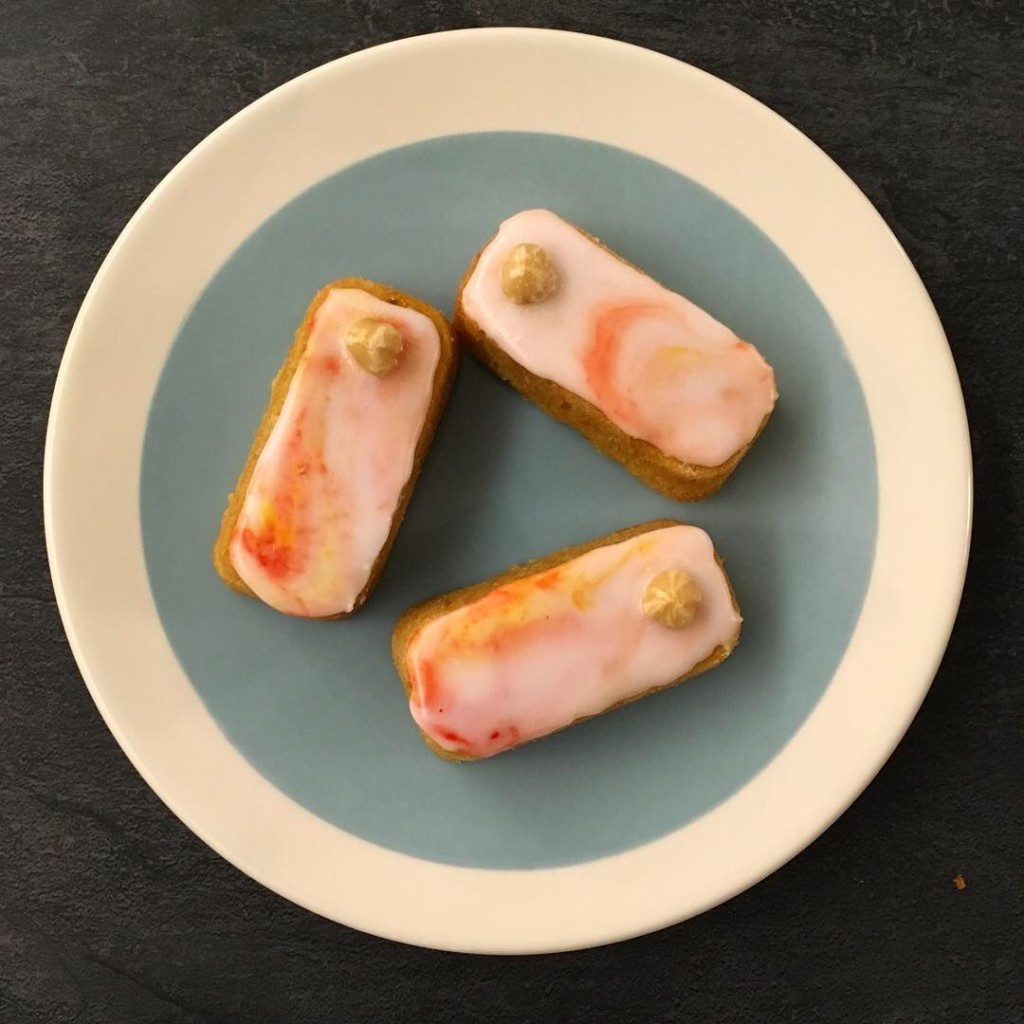
I absolutely love using marbled icing in bakes and I feel it’s worked well here! Please try it and use whichever colours you like, although I do feel that greens can give the impression that the cake is slightly mouldy. That said, do as you feel. I tend to choose my colours to represent the flavours that are in the cake; pink for rose, orange for orange blossom etc etc.

This recipe is fab if you’ve got posh friends you want to impress, or you want something that’s delicate but packs a punch in both flavour and texture. Naturally, you could make these as regular cupcakes, but if you’re an avid baker then maybe get a rectangular tin. I can’t wait to use mine again.

Hazelnut and Orange Blossom cakes

Hazelnut and Orange Blossom Cakes: makes 12 (gluten free, dairy free)

170g dairy-free spread (or butter, if you wish)

110g light brown sugar

110g plain gluten free flour

1 teaspoon baking powder (ensure it’s gluten free)

75g blanched hazelnuts (get chopped if you can)

3 eggs

1 orange

Orange blossom water

200g icing sugar

Food colouring

  1. Preheat the oven to 180 degrees.
  2. Cream the dairy-free spread or butter with the sugar using an electric mixer.
  3. If your hazelnuts are not chopped, chop them in a food processor until you have very small chunks.
  4. Add the chopped nuts, flour, baking powder, eggs, one teaspoon of orange blossom water, and the zest of an orange to the butter mixture and combine using an electric mixer.
  5. Distribute the mixture equally between the sections of the pan.
  6. Bake for 15 minutes.
  7. After a few minutes, pop the cakes out and leave to cool.
  8. To make the icing, combine the icing sugar with two teaspoons or orange blossom water and a little fresh water until you have a thick, runny consistency. The icing should be opaque white.
  9. Leaving the icing in the bowl, add around four dots of pure food colouring. Don’t mix it in! Use a teaspoon to dollop some icing on top of the cake. As you move the icing to cover the cake, the colouring will stretch into the white icing and you will see a marbling pattern. Some cakes will have more marbling than others, and they will all look different.
  10. I had some hazelnuts left over so I finished each cake with a single hazelnut on the side. I think it looks fancy.

Stollen macarons

As a gluten-free girl, I don’t have many opportunities to eat stollen.  I’ve never even tried the authentic, bready German stuff.  The closest I’ve come is a squidgy, decadent, cakey variety which I buy from WholeFoods (very boujee) if I get the opportunity. 

I love the combination of sweet marzipan with sharp cranberries.  Those sugar-dusted squares are expensive, and addictive.  Over the past few days I’ve been thinking about stollen, dreaming of other ways to present it.  Then I hit upon macarons.

Stollen macarons

I started making macarons back when they became trendy a few years ago.  I bought a book with my mother (by Hisako Ogita, I still use it) and we pored over it.  I still take it as gospel, and I get consistent results. 

Macarons are so versatile that it seems natural to infuse them with flavours and textures from other puddings.  The result is a crispy, chewy macaron with a luscious filling, a bitesized version of whatever you want.  It’s almost a bit wonka-esque.  And this time it’s stollen.

Stollen macarons

This particular macaron boils down to three elements: the macaron itself, which I flavoured with cinnamon and vanilla, an almond buttercream filling, and some tasty little bits which I rolled the assembled macarons in, to give a sort of…belt?  I don’t really know what to call it.  These little specks of dried cranberry and pistachio, or candied mixed peel, stick to the buttercream which peeks out from the macaron and provide extra colour and flavour.    

I’m sure this won’t be the last macaron recipe which I post to this blog, but I’ll try to space them out a bit.  Until next time, enjoy this recipe if you make it.  They’re rich but not too sweet, and would work nicely as canapes or presents.  

Stollen macarons

Stollen Macarons

Makes about 32 macaron biscuits, 16 when assembled.  Should keep in the fridge for about a week.

For the Macarons:

85g ground almonds

150g icing sugar

3 egg whites, at room temperature

5 tablespoons/65g caster sugar

2 tsps cinnamon

1 tsp vanilla extract

For the Almond Buttercream:

150g butter (I use slightly salted)

100g icing sugar

1 tsp almond extract

The Extras:

Mixed candied peel

Pistachios

Dried cranberries

  1. First, measure your baking paper to your trays and draw circles all over the paper in pencil.  Use anything small and circular.  You can draw them quite close as the macaron batter won’t spread too much.  Remember to flip the paper over so that the macarons are not directly on top of your pencil marking: graphite is not the secret ingredient in this particular bake.
  2. Mix the ground almonds, cinnamon, and icing sugar together in a small bowl and set aside (just kidding.  Use whatever size of bowl you like.  Who am I, the bowl police?).  
  3. The next step involves making a French meringue (or as it’s otherwise known, a meringue).  If you know how to make meringue, feel free to zone out for the next step. 
  4. For the rest of you, here it is.  Beat your egg whites.  When they are foamy, begin to gradually add the caster sugar, whisking all the time.  Eventually you will end up with stiff, glossy egg whites.  Then you add the vanilla extract (briefest meringue explanation ever?  Now feeling paranoid that it is too brief.  For goodness sake, please go to youtube and watch somebody more experienced than me if you have never made meringue before).
  5. Now, as the spice girls said, two will become one.  Add half of your dry mixture to the meringue and fold it in gently, then add the rest and continue to fold it in until you have a lovely mixture.  
  6. Now you have to do ‘Macaronnage’ with your lovely mixture.  Hold the bowl at angle.  Spread the mixture along the sides of the bowl then scoop it all back in.  Do this fifteen times exactly or your macarons will be cursed.  
  7. Place your lovely mixture into a piping bag with a circular tip and pipe onto your prepared trays (hint: put your tray in another tray to shield the delicate macarons from too much heat or they will be cursed).  
  8. Pick up the baking tray which your macarons are on and drop it on a flat surface.  It will make a horrid clatter but it is an essential step in helping to form the pied (the little frill at the bottom of a macaron).  
  9. Leave your macarons alone in a room until the top is no longer sticky to touch (usually about half an hour).  But don’t abandon them for too long (bla bla curse bla bla).
  10. Cook them at 180 degrees for about sixteen minutes.  The outside should feel crisp and dry and they should lift easily off the baking paper.  
  11. Now blitz the butter with the almond extract and sugar to make the buttercream filling, which you can then pipe or spread onto your macarons.  Be generous, you need a good rim of buttercream for your extras to stick to.  
  12. Speaking of your extras, finely chop them and roll your filled macarons on them.  Little fragments of peel, pistachio and cranberry should stick to the exposed buttercream.